• Contact Kim
  • Stay Connected
  • Shop Printables
  • Nav Social Menu

    • Facebook
    • Instagram
    • Pinterest
    • Twitter

Salvaged Living

Easy DIY home decor and craft projects for budget home decor

  • Home
  • Meet Kim
    • About KIM
    • Get Kim’s Look
    • Kim’s Bookshelf
    • Kim’s Home Tour
    • Get The House Look
    • Disclosures
  • DIY Projects
  • Faith
  • Home Decor
  • Grow Your Creative Business
    • Grow Your Creative Business Course
    • One on One Business Consulting
  • Classes
Home » DIY Projects » Washi Tape Storage Idea

DIY Projects

Washi Tape Storage Idea

Get Your Washi Tape Storage Idea Here!Need an easy Washi tape storage idea? Look no further! This DIY Washi tape organization station will have you whipping out Washi tape crafts like a champ.

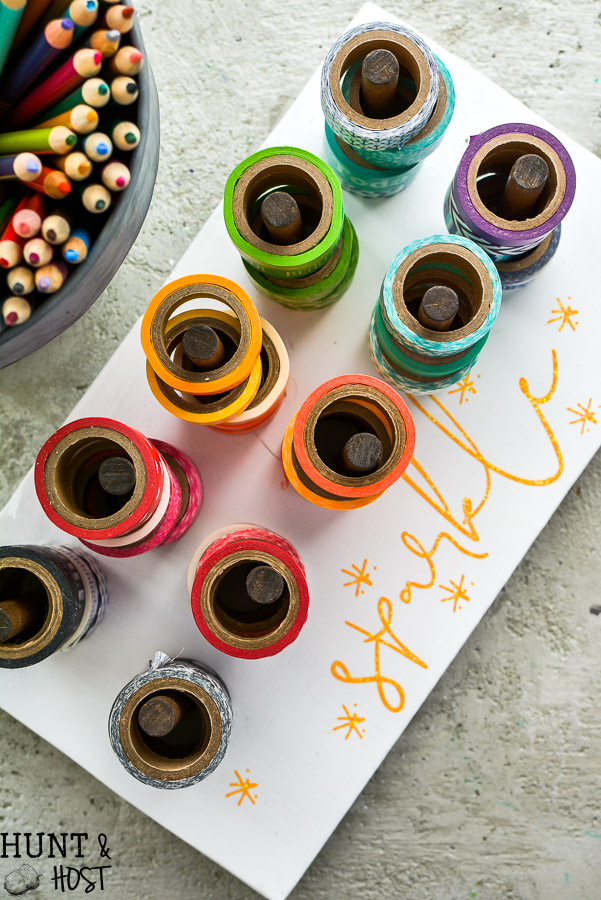
My daughter loves Washi tape! She is always covering something or crafting with it. I have to admit it’s pretty cool. She was looking for a fun way to organize her Washi tape so of course I was up to the challenge.

This post contains affiliate links, should you make a purchase I might make a small commission, your price stays the same.

Not to long ago I got our rain boots in order with an easy organizing idea and the same principal was perfect for the Washi tape situation. I found a piece of scrap wood in my pile and got a dowel rod from the store.  I measured off spots to place the dowel rods on the board, making sure the Washi Tape would have room on each. Using a paddle bit on my drill the same size as the dowel rod I drilled holes into the board large enough to accept the rods.Need an easy Washi tape storage idea? Look no further! This DIY Washi tape organization station will have you whipping out Washi tape crafts like a champ.

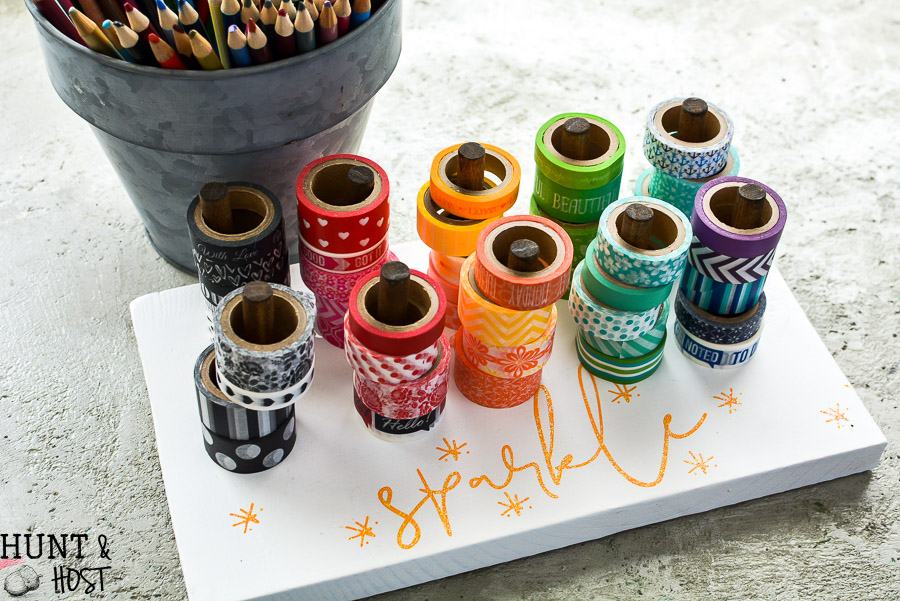
For the dowel rods I cut them down using my mitre box saw (it is so handy! I used it for all my dollhouse makeover tasks). If you aren’t into power tools this little hand saw can really help you with small projects like this one. I use it inside the house and just sweep up after.Need an easy Washi tape storage idea? Look no further! This DIY Washi tape organization station will have you whipping out Washi tape crafts like a champ.

It’s mush easier to stain a rod than paint it so I went with a two tone look, staining the rods and painting the base. Once dry I used wood glue dabbed on the end of each dowel and placed them in the holes, perfect for Washi Tape storage.Need an easy Washi tape storage idea? Look no further! This DIY Washi tape organization station will have you whipping out Washi tape crafts like a champ.

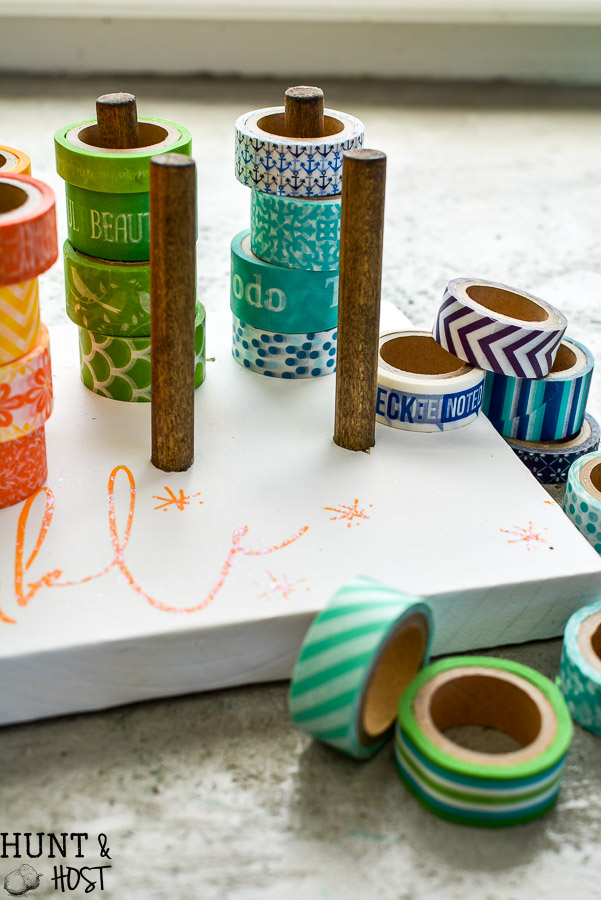
To really take the cuteness up a notch I added some text with my new Chalk Couture Paste and transfer. Y’all this stuff is insanely easy and fun. Using a transfer I wiped the Chalk Couture Paint, quickly removed the stencil and sprinkled the wet paste with glitter. You can check out their products in my store here! (let me know if you have any questions) Need an easy Washi tape storage idea? Look no further! This DIY Washi tape organization station will have you whipping out Washi tape crafts like a champ.
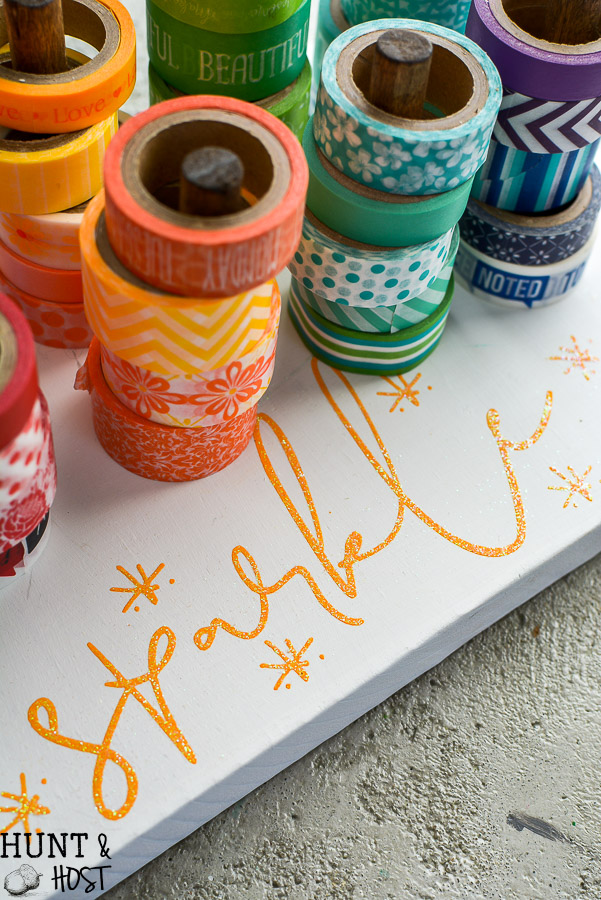
The great thing about this DIY Washi Tape holder is that you can make the dowels as tall as you’d like, make the board longer…any adaptations to meet your needs. Getting organized is always fun! I find you are way more likely to use your supplies when you can see what you have, so I hope this solution helps you get crafty.Need an easy Washi tape storage idea? Look no further! This DIY Washi tape organization station will have you whipping out Washi tape crafts like a champ.

Blessings, Kim from Hunt & HostConnect more here:

E-mail Subscription / Pinterest / Facebook / Instagram / Grow Your Creative Business


4 Comments

Stay connected

Don't miss out on the latest!

By being included in our newsletter delivery, you consent to receive new post updates and occasional promotional emails related to the Salvaged Living family. We promise not to over stuff your inbox!

Previous Post: « Fabric Remnant Pillows
Next Post: Easter Recipes and Ideas »

Reader Interactions

Comments

  1. rawsonjl says

    March 14, 2018 at 4:44 PM

    I just LOVE this idea! Pinned. 🙂

    Reply
    • Kim at Hunt and Host says

      March 18, 2018 at 8:06 PM

      thank you – you are my favorite 🙂

      Reply
  2. Rosemary Parker says

    September 10, 2019 at 11:52 AM

    I was wondering if anyone could suggest how or what i can use to keep all my different occasional cards separated

    Reply
  3. Danna says

    September 10, 2019 at 1:56 PM

    That’s such a great idea. This would also work for ribbon. Thank you for everything you do.

    Reply

Leave a Reply Cancel reply

Your email address will not be published. Required fields are marked *

This site uses Akismet to reduce spam. Learn how your comment data is processed.

Primary Sidebar

  • Email
  • Facebook
  • Instagram
  • Pinterest
  • Twitter

Hi! I'm Kim. I believe getting your hands dirty can be a way to get your heart clean. This blog is a decorating and DIY guide to seeing God in the details of your day, hobby and home. Read more...

Learn to grow a creative business with Kim from Salvaged Living!

Check these out:

  • DIY Projects
  • Faith
  • Home Decor
  • Lifestyle

Stay Connected

Don't miss out on the latest.

By being included in our newsletter delivery, you consent to receive new post updates and occasional promotional emails related to the Salvaged Living family. We promise not to over stuff your inbox!

Stay connected

Don't miss out on the latest.

Footer

You might also like

A broken cane chair redo. This cane chair makeover is easy to do yourself. Jeremiah 30:17

Round Up of Winter Ideas

How to make wall art larger. Make sure you fill your walls with the correct scale artwork. This decorating idea will help you use what you have to make artwork that fits your space beautifully. #walart #decoratinghack #decoratingtip #DIYwallart #interiordecorting

How to Make Wall Art Larger

This Seagull inspired coastal bench makeover is just one of many coastal inspired furniture flips you'll find here! www.huntandhost.net

Coastal Inspiration

Learn how to hang pictures on brick wall easily with this step by step tutorial. Haning pictures on brick is easy with the right tools and can make your outdoor living space feel like a cozy room in your home. #howtotip #decoratinghack #patiodecoridea

How to Hang Pictures On Brick Wall

summer project and recipe ideas from your favorite bloggers

Summer Project Ideas

© Kim Jones and Salvaged Living, 2019. Unauthorized use and/or duplication of this material without express and written permission from this blog’s author and/or owner is strictly prohibited. Excerpts and links may be used, provided that full and clear credit is given to Salvaged Living with appropriate and specific direction to the original content. Please only use one picture with a link back unless individual permission is given otherwise by Salvaged Living. Full disclosure here.

© 2021 Salvaged Living

We use cookies to ensure that we give you the best experience on our website. If you continue to use this site we will assume that you are happy with it.Ok