How to monogram rain boots with a vinyl decal
Ever since I was a little girl I loved to see my name on things. It was a special treat to get pencils with Kim engraved on them or find something cute from the Hallmark store with my name on it. Monograms and personalization were nothing like what we have today. I still love to have things personalized, especially with a monogram.
A while back I made a “gifts that give back” list and Roma Rainboots were on the list. They work to give poverty the boot by donating boots to people in underprivileged countries that need rain boots to work or walk to school in rough terrain and climate. Roma is making a difference in the lives of so many kids and adults. I was smitten with the company and the boots and my mom gave me a pair for my birthday. I love any excuse to pull them out and wear them often. I decided it was finally time to monogram them. I’m going to give you a step by step on how you can do the same thing. I promise you will want to monogram your whole world! Here is a resource list to get you started and then we will dive into detailed instructions!
DIY Monogram Rain Boots with a Vinyl Monogram Supply List
You will need to find a font you like, there are multiple places to find good fonts. I got this font package from an esty shop and use it all the time. It’s not expensive and has multiple options. The font you see in this project is the interlocking monogram font. Monogram Font Bundle seen here. Download the font files into a location you know how to find on your computer. If you purchase or find a different font make sure you get the correct file type that will work in Cricut Design Space. (see next step)
Open Cricut design space. Look on the left hand side and go to the Upload Tab. You will see a cut your own images for free section with file extensions you can use. (.jpg, .gif, .png, bmp, .svg or .dxf files.) The font bundle above comes with svg, png and dxf files so you are completely covered with it.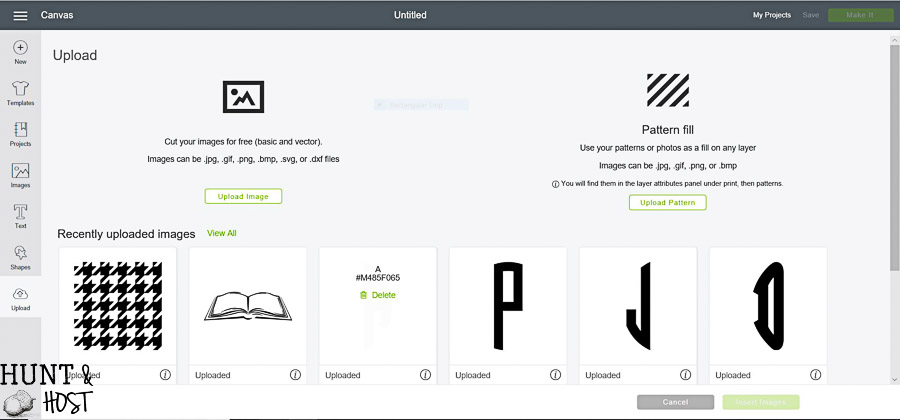
Click the upload image button and go to your monogram font files. For this example we will use the svg files. When you open the interlocking monogram svg file you will see three files you need to pay attention to, left, middle and right. My name is Kim S. Jones so I would need to upload the left K, right S and middle J, because the middle letter is the center of your monogram. 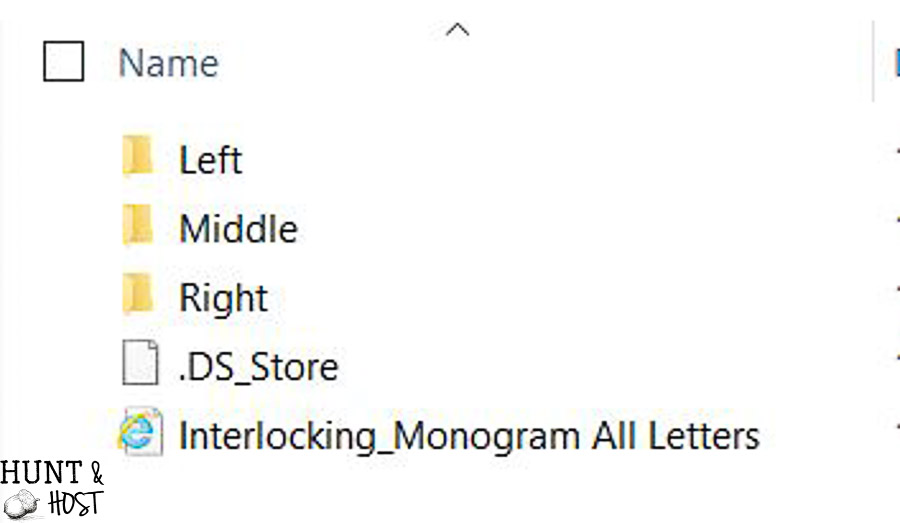 Upload each letter you need in the correct position. The first time you do this it takes a few minutes, but you will only have to do it once for each letter you want to use. See the difference between the middle s and right s below? the middle one is all fancy. 🙂
Once your letters are uploaded, highlight the letters you want to work with. Next go to the bottom right hand corner and hit insert images.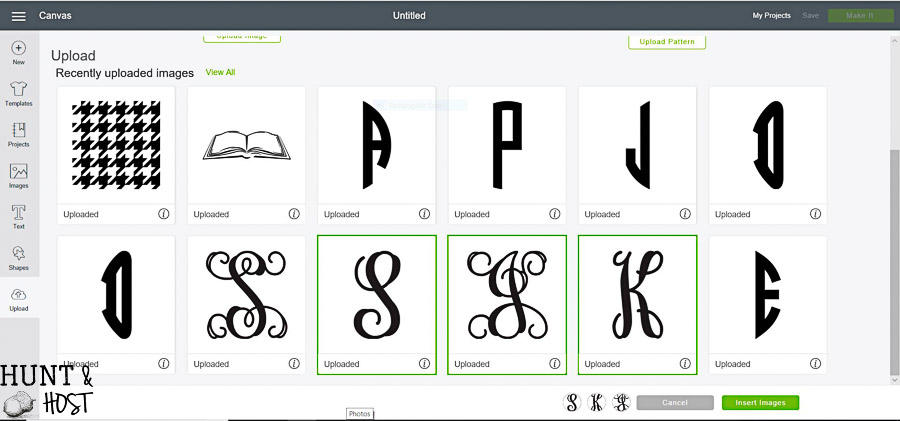
Your letters will likely import large, so click on each one and use the blue arrows in the bottom right hand corner of the letter to size the letter smaller. You can also use the menu box where it says size to type in desired dimensions.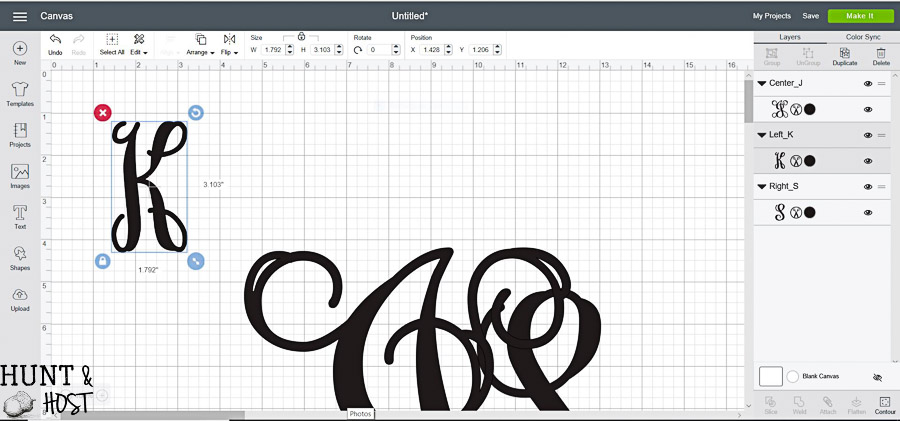
Now play around with the size and layout of your monogram by dragging the letters and making them bigger or smaller, paying attention to how they overlap. Make sure your last name initial is in the middle and larger than the other two letters.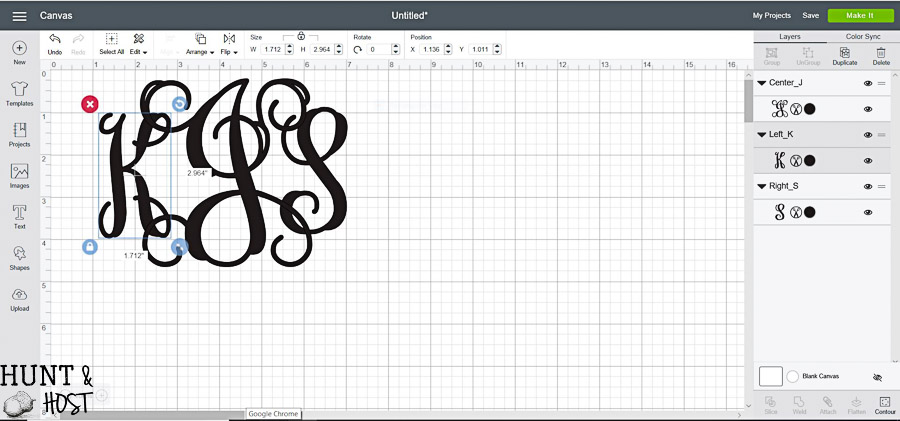
Once you have the layout that makes you happy hold down the control button and click on each letter. Once all three are highlighted together look in the bottom right hand corner and click weld. Now your layout is stuck together in one piece and you can change the overall size of your monogram by dragging the blue arrows.
Decide what size monogram you need, most rain boots will probably accept around a 3 to 4 inch tall monogram. Use the grid on the page to measure your monogram. The picture above shows you a 3 inch tall monogram layout.
Now save your monogram by hitting the save button in the top right corner and following the prompts.
Since you will be making two monograms for rain boots, copy and paste (I highlight, right click, copy, move cursor, right click, paste) your new monogram and you can cut them at the same time!
You are ready to cut. Click Make It in the top right corner. This will give you a preview of how the monogram will cut on your mat. You can drag your monograms around on the mat to wherever you want them to cut, I put mine close together and at the top to save vinyl.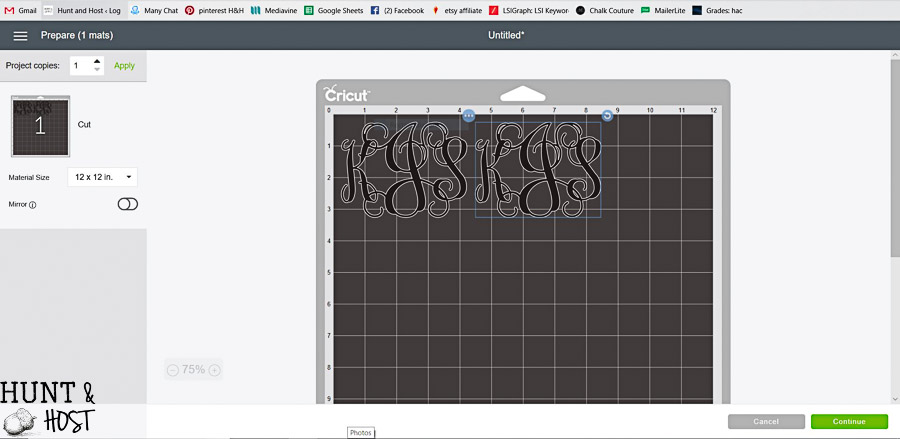
Make sure your material size is correct (meaning the vinyl sheet size you are using) and your machine is connected to your computer.
Select the material selection with the dial on your Cricut machine. TEST this out FIRST before you go cutting a large vinyl piece. Different materials cut different than the dial suggests sometimes. Even different brands or finishes of vinyl can make a difference. I find that on my machine I have to turn the dial two clicks past the material I am using to get it right. Please TEST FIRST by cutting something small and making sure the vinyl is cut through but the backing is not!
Load your mat and press the flashing C when you are ready to go.
Next cut your decals off the large sheet of vinyl and “weed” them. That means you remove the negative parts of the monogram you don’t need until you are left with only the monogram. I HIGHLY recommend using transfer tape for the next part (see source list). You simply peel off the backing of the transfer tape and smoothly place it over the decal. Smooth with a credit card or blunt edge. Peel the monogram off it’s backing and use the transfer tape to apply your new monogram to your boots. I roll the monogram on gently and then once in place use a blunt edge to smooth out the letters and make sure they adhere well. You can place the monogram on the front of your rain boots like I did or it looks great on the outsides as well!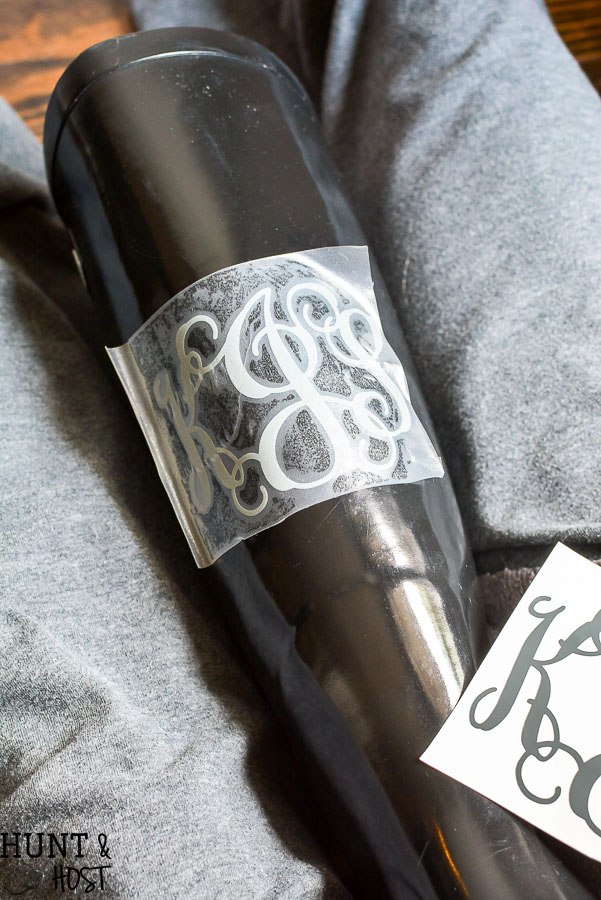
You are all done! Now next time you want to use the same monogram the hard part is done and you just adjust the size and cut! You will want to monogram everything and you easily can!!! Hope this tutorial helps, let me know if you have any questions! I’d appreciate you sharing this or saving for later!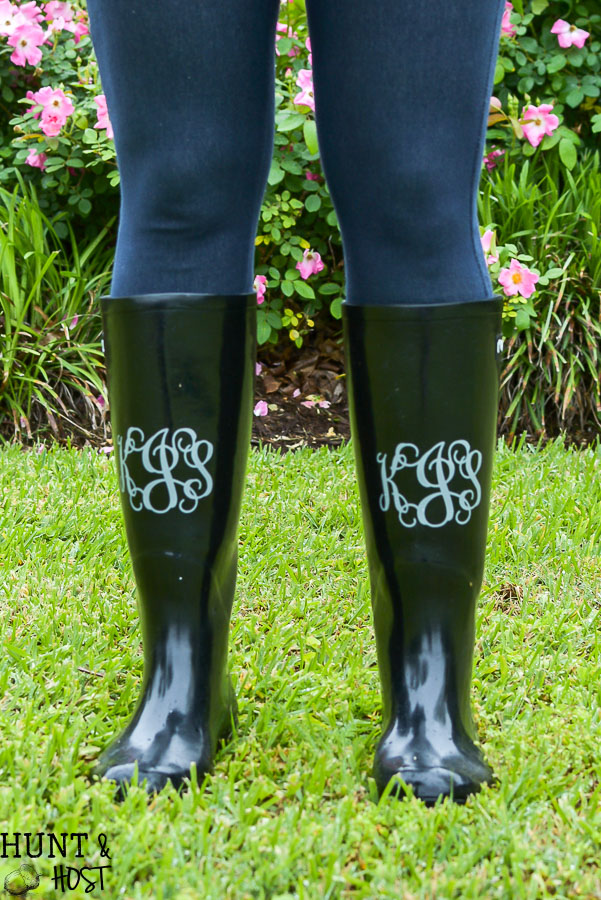


Those are so cute, thanks.
thank you!
Those are so cute!!! Are the boots true to size? I’m a 7 1/2
Thanks – They seem to be for me! They are really comfy!
What kind of vinyl did you use? And did you seal it or anything?
Hi Joy – I use the vinyl I linked to in the supply list above, I order mine on line and think it works best from my experience. I did not seal it in any way, the vinyl is pretty sturdy and able to get wet! Hope that helps, thanks for stopping by!
I was one of those unfortunate souls who was never, ever able to find something at Astroworld with their name on it. Thanks Mom & Dad for the first name with three – 3! – vowels and also the the inventor of the Cricut. My Air 2 has let me feel like one of the regular name people. And as a good Southern woman, I’m monogrammed just about everything I own but I never once thought about my rain boots. Thank you for the great idea!
lol – my poor kids never find their name in a commercial setting either but a Cricut is God’s gift to the original named souls!!! So glad you like this idea, it is so fun!
How long does it last on boots
If you use the good permanent adhesive vinyl it will last a super long time, mine have been on a while over a year at least. It isn’t an area that gets messed up too easily!
Hi, I know there is a link to the vinyl you use, but it has different products. Did you use Oracal 651 or 751 for the rainboots.? Thanks in advance for reading this. I really love those boots…
hi – so glad you like the boots and I am pretty sure it was the 651!
Why do some people use 751?
i honestly don’t know the difference!? mine works fine though!